Greetings everybody!
Today I have a shorty for you.
When I left the grim dark skull-encrusted future, I also left the sand-glued-on bases basings. Not that there is anything wrong with them, but I felt the change should be also seen on the ground. In addittion to that, I left 40k for Sedition Wars, which was coming with loads of beautifull pre-done bases. SInce I didn't stop with on set of the game, but several, I had plenty miniatures I didn't actaully need for the game and plenty of left over bases.
So, when I switched to Infinity, I didn't had to worry about cool base design, I already owned loads of them. But even the biggest depots come eventually to an end and so did my SW bases.
There fore I have started to look for alternatives and one of them I want to show you today.
This shall not be a review, so, no tentacles today, but I hope to give you a little insight on this product.
I am talking about the Warsenal Tunguska Bases
Since I haven't found any unpainted pictures of the bases, I was really excited to learn on how theres are going to work.
And I was quite surprised to find this:
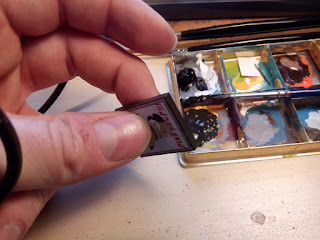
On the one side, you have the bottom plate, including a neat Idea, I will show you later. The other side is textured.
To give you a better idea on how they are, I have put them next to a standard base from CB, a base from Sedition Wars and a Lazaretto Base from Antenocities Workshop , bases, I have already used. I really like them, but they don't give much of variation.
As you can see, the clue with the Tunguska bases is, they have pretty much half the height of a normal base. So when you glue the two parts together, you get the height of a normal base.
And here we have the only problem I am having with the bases...
Even with sanding, it is close to impossible to get the glue line gone, without using putty. I have applyied super glue gel richly and tried to cover up the gap with that a bit, but it still stands out pretty much.
I decided to accept this minor nack, since you get quite a lot for it. As you can see the details don't stand out that much as they do on the
other bases. On the other hand, the texture suggests that more of a space
ship feeling anyhow, where flat surfaces are to be expected. Another bonus is, that you get 10 different designs. I was expecting that they had made 5 designs and sold them just twice, but, no sir... 10 individual bases.
And...
The hole in the bottom layer of the base...
...is perfect for the 3mm magnets I am using. Surely there are magnets out there that fit completly. But I am happy with what I have here :)
So, now the real test was on: Would the lasered in lines would disappear under to much paint?
As with my other bases, they got a coat of brown from the can.
And, tadaaa, the lines are still there. If you were going for a clean look, you could add some highlight, pick out the details and would be good to go.
As I have shown elsewhere already, I apply a mix of watered down orange and orange pigments...
soak them in that mix...
apply some liquid mask with a sponge...
add the blue I am using (the three on the left side) and rub away the mask (on the right side)
...and get some bases that only need some details and are good to go.
Put aside with other bases, you hardly see the difference.
All in all I have to say they blend in really well with the others, as you can see here:
See you next time!
Sunday, March 13, 2016
Friday, March 4, 2016
How to - Holos and Wallpaper
Greetings everybody!
And welcome back to another "How to" Article.
This time I want to show you how I do Holosigns and Wallpapers.
For those, not so familiar with the mentioned above, let me explain a little.
The first time I stumbled into Infinity, I instantly fell in love with the terrain you "need" for it. The international Forum has been a great source of inspiration even when I was still dwelling in the grim dark future of the 41st Millennium. And one part of the terrain cought me by surprise: printed out stuff. Since there a still walls standing in Infinity, there is also space for commercial posters of all sort. I adopted these back then for 40k terrain, but when I switched to Infinity, I became aware of the full potential that lies in print out stuff.
Today, I want to show you what I have learned over the years.
But first we have to care about some basics:
- Paper. Of cause you need something to print on. I use the standard copy and print paper. Surely you can et more fancy stuff, but depending on the looks you want to achieve, paper might get to thick and would look awkward.
IMPORTANT Check if you have a Laserprinter (the better, but way more expensive choice) or a Inkjet (works prefectly also. That's what I use btw) and choose the OHP sheets accordingly.
When you buy your OHP sheets, make sure the medium layer is a s thin as possible. I have tried several different brands and found out, that, the thicker the medium layer, the more blurry the pictures will get. And since you will be printing stuff in the size of a stamp, you don't need blurriness. The stuff I am currently using is from Label Ocean and comes with a rather fair price. Of cause, you can pay more, but that sadly doesn't necessarily mean they are better.
- Varnish Spraycoat. It is important to have a spray on varnish. There are several brand on the market, but I am stuck with my beloved Montana Cans, since they dry compared to other brands rather quick and I am an impatient person. You will need a Gloss and a Matt spray. The benefits of a Gloss Medium is, that they create a really strong and solid layer. What every varnish you use, make sure you test them on something else before you use them on your models or prints. I for example have destroyed the paint job on a huge bunch of imperial guard soldiers, since the varnish had turned bad. And suddenly they looked like they had fallen in the ash bin.
- Gloss Varnish Liquid I have spotted no big different between the brands. Head to your local art store and check out what they have. Of cause Vallejo offers a Gloss Varnish, but that is rather pricey compare to other brands.
- Other Stuff What you will defiantly need is a metal ruler and a sharp blade. What else you need, depends on your project. For some simple wallpapers you will additionally need just some white glue. The Holos need a bit more.
- Stuff to print Of cause you will need images you can print out. There are several collections on the international forum here , my personal collection here or you go hunt on google or deviant art for pictures. You can also go as far as do your own stuff. I preferred to use existing images and work on them until they suite my propose. There are several programs with Photoshop being probably the most famous (and most expensive). I am using Paint.Net a rather basic program, that can get boosted quite easily with plug ins to great effect. Last but not least, the are zillions of different fonts out there, that easily beaf up you posters. I could probably write an whole article about this... so I shall leave this here for now.
So... since you probably by now have stopped reading or have run of to get all things sorted, let's start with something simple...
First of all we have to have a look at what we want to achieve.
Here we have a few possible uses assembled. To the left you have some simple posters. Believe me, posters will make your building way more "realistic" since they give the gamers and observers a sense for height and usage of the buildings. Measure careful how large your posters shall be. Most of the time they will be around 2 or 3 cm in hight.
To the right we have another usage. Graffiti often comes with the so called outline. These white lines, that surround the painting aim to give a greater contrast between building and painting. We can use that to our advantage. I simply printed that gasmask deer and cut out an outline. Sometimes there are other colors used in graffities... get creative. Either make a addition white out line or carefully cut along the colored outline. Here it is important to use thin paper. Otherwise the graffiti will stand out to much and won't look like painted on the wall.
So. here some steps to wallpapers.
1. Print out.
Set your printer to max dpi and let the print dry.
2. Varnish
Give your print two coats of varnish. First a glossy (makes it sturdier), second a matt (unless you like the gloss look, then go for another layer of gloss). Make sure the gloss is fully dried before you spray it a second time.
3. Cut
Cut the stuff out. Simple as that...
Now you have your posters. You can go and simply glue them with white glue into place. Done.
If you want the posters to stand out a bit more, here is a thing you can do. It works with anything that has a thickness on its own. I am using foamed pvc, but can also use MDF or sheets of thick plastic. Really depends on the look you want to achieve.
4. Bring the Prints on the surface
For a better grip, I use some sandpaper to roughen the surface.
Then I use white glue and a brush to make a thin layer of glue on which the prints are placed
After it is cured, I cut out the posters again...
Since I don't care much for the Green of the PVC, I use some paint to make the edges black.
There you go. Now you can glue them into place on your buildings.
But, why the varnishing steps you ask? One could simply print and cut out an glue the pieces into place.
Yes you could. But during the whole process, your print will be vulnerable to water and glue of any sort. A single drop can ruin a print quite easily. And if you want to add some weathering of some sort or paint a graffiti on it, your print will smear.
The varnish cares for a protective layer you can work on... i.e. like this.
And here they are glues into place on my current terrain project.
Holos are, as this epic piece of Infinity Artwork shows, an essential part of the cyberpunk future feeling that is spread by the game.
Microart Studios pretty early realised that and produced a set of Holoboards for the battlefield. With that they sat a standard on how these Holos look on a tabletop.
They produced two different styles, the see-through and the... not-see-through... as depicted here:
So, when doing Holos, my aim was to replicate the style of these.
Okay, let's dive into it... HOLOS! YAY!
1. Print
Use the OHP sheets of your choice and print out the designs.
2. Varnish
Again, as with the paper prints, put some varnish on. Here it is best to use two layers of Gloss Varnish.
3. Let it dry and cut it apart
What can I say? Oh... maybe that you should leave a little extra space on the sides of your print. It is easier to cut any leftovers away later, that to cut too much in the first place...
No... you don't see double... I printed the same thing twice...
... why? Prints on OHP (unless you have a super duper printer with the perfect printer set up) will always loose some color and brightness. But we want our Holos to be colorful an crisp. So, I came up with the idea to print them twice an put them on top of each other. That increases the vividness of the colors drastically.
4. Gluing the prints
The basic idea is, that you use the liquid varnish (glossy as gloss can get) to "glue" the prints on top of each other. You can simply put some few small dots of varnish on one side and then press them together. Of cause a lot of liquid will squeeze out on the sides, but that's not too bad. You have to watch out for air bubbles and squeeze them out.
You can do that so simple, because you have protected your print with the spray varnish. If you don't do that, you might get something like this:
As you can see, the varnish has reacted with th medium on the OHP sheet, smearing the print all over the place.
5. Plexiglass
As you can see, looking at the MAS Holos, the really work just from one side, since on the thick plexiglass they use, one side is printed on and the other side is "the front" looking from there the Holo get's it depth. But looking from the "other side" the Holo looks more like a Poster.
To avoid that, I went to my local at store a got a sheet of 2mm plexiglass. I am going to "glue" it on both sides of the print, so the "holo effect" works from both sides.
Additionally I am going to use some clamps and some thick sheets of MDF to keep everything in place.
Again, some varnish...
...some clamp clamp to keep everything in place...
...all most...
...just peel of the foil...
... and... TADAAH! The Holo is done!
Now I just need some sort of frame to hold it in place. I didn't build one before, since I didn't know how thick the final thing would be. Something like this:
I really like to use leftovers from the sprues, since they most of the time fit already perfectly.
6. Other uses
Once you have "mastered" this technique, the possiblillities will open up. On the Datapilar Building, i.e., I have used two prints on each side of a thick Plexiglass sheet. This way another sort of Holoeffect is achieved.
Well. That's basically it. The rest is practice, a steady hand and some imagination. I dearly hope you found all this useful.
Until next time!
And welcome back to another "How to" Article.
This time I want to show you how I do Holosigns and Wallpapers.
For those, not so familiar with the mentioned above, let me explain a little.
The first time I stumbled into Infinity, I instantly fell in love with the terrain you "need" for it. The international Forum has been a great source of inspiration even when I was still dwelling in the grim dark future of the 41st Millennium. And one part of the terrain cought me by surprise: printed out stuff. Since there a still walls standing in Infinity, there is also space for commercial posters of all sort. I adopted these back then for 40k terrain, but when I switched to Infinity, I became aware of the full potential that lies in print out stuff.
Today, I want to show you what I have learned over the years.
But first we have to care about some basics:
Stuff you will need
- Printer. To print out stuff you obviously need a printer. Get comfortable with the different settings your printer has and try to get as much dpi (dots per inch) on your print as possible. The standard printer setting is 300 dpi, but you should easily be able to tweak at least 600dpi from it. The higher the dpi the sharper your print will get. I had to fiddle around a bit with my printer... but now, I am quite satisfied with the results.- Paper. Of cause you need something to print on. I use the standard copy and print paper. Surely you can et more fancy stuff, but depending on the looks you want to achieve, paper might get to thick and would look awkward.
- OHP-Sheets. The use for that will be explained later. Here, I shall give you a little insight on the sheets. The technique behind OHP-Sheets is rather simple. One side of the transparent foil sheet is covered with a medium, that will get soft, once hit by the printer ink. As the print dries, the small ink dots will get fixed on spot and create the image.
IMPORTANT Check if you have a Laserprinter (the better, but way more expensive choice) or a Inkjet (works prefectly also. That's what I use btw) and choose the OHP sheets accordingly.
When you buy your OHP sheets, make sure the medium layer is a s thin as possible. I have tried several different brands and found out, that, the thicker the medium layer, the more blurry the pictures will get. And since you will be printing stuff in the size of a stamp, you don't need blurriness. The stuff I am currently using is from Label Ocean and comes with a rather fair price. Of cause, you can pay more, but that sadly doesn't necessarily mean they are better.
- Varnish Spraycoat. It is important to have a spray on varnish. There are several brand on the market, but I am stuck with my beloved Montana Cans, since they dry compared to other brands rather quick and I am an impatient person. You will need a Gloss and a Matt spray. The benefits of a Gloss Medium is, that they create a really strong and solid layer. What every varnish you use, make sure you test them on something else before you use them on your models or prints. I for example have destroyed the paint job on a huge bunch of imperial guard soldiers, since the varnish had turned bad. And suddenly they looked like they had fallen in the ash bin.
- Gloss Varnish Liquid I have spotted no big different between the brands. Head to your local art store and check out what they have. Of cause Vallejo offers a Gloss Varnish, but that is rather pricey compare to other brands.
- Other Stuff What you will defiantly need is a metal ruler and a sharp blade. What else you need, depends on your project. For some simple wallpapers you will additionally need just some white glue. The Holos need a bit more.
- Stuff to print Of cause you will need images you can print out. There are several collections on the international forum here , my personal collection here or you go hunt on google or deviant art for pictures. You can also go as far as do your own stuff. I preferred to use existing images and work on them until they suite my propose. There are several programs with Photoshop being probably the most famous (and most expensive). I am using Paint.Net a rather basic program, that can get boosted quite easily with plug ins to great effect. Last but not least, the are zillions of different fonts out there, that easily beaf up you posters. I could probably write an whole article about this... so I shall leave this here for now.
So... since you probably by now have stopped reading or have run of to get all things sorted, let's start with something simple...
Wallpapers
First of all we have to have a look at what we want to achieve.
[EDIT: For reasons unknow to me, the are few this black after this point. I have absolutely no idea, why that is and how to change it. I have tried all sorts of things, but it still refuses to appear in the correct color. I am really sorry for that!]
To the right we have another usage. Graffiti often comes with the so called outline. These white lines, that surround the painting aim to give a greater contrast between building and painting. We can use that to our advantage. I simply printed that gasmask deer and cut out an outline. Sometimes there are other colors used in graffities... get creative. Either make a addition white out line or carefully cut along the colored outline. Here it is important to use thin paper. Otherwise the graffiti will stand out to much and won't look like painted on the wall.
So. here some steps to wallpapers.
1. Print out.
Set your printer to max dpi and let the print dry.
Give your print two coats of varnish. First a glossy (makes it sturdier), second a matt (unless you like the gloss look, then go for another layer of gloss). Make sure the gloss is fully dried before you spray it a second time.
Cut the stuff out. Simple as that...
Now you have your posters. You can go and simply glue them with white glue into place. Done.
If you want the posters to stand out a bit more, here is a thing you can do. It works with anything that has a thickness on its own. I am using foamed pvc, but can also use MDF or sheets of thick plastic. Really depends on the look you want to achieve.
4. Bring the Prints on the surface
For a better grip, I use some sandpaper to roughen the surface.
There you go. Now you can glue them into place on your buildings.
But, why the varnishing steps you ask? One could simply print and cut out an glue the pieces into place.
Yes you could. But during the whole process, your print will be vulnerable to water and glue of any sort. A single drop can ruin a print quite easily. And if you want to add some weathering of some sort or paint a graffiti on it, your print will smear.
The varnish cares for a protective layer you can work on... i.e. like this.
Holos
Holos are, as this epic piece of Infinity Artwork shows, an essential part of the cyberpunk future feeling that is spread by the game.
Microart Studios pretty early realised that and produced a set of Holoboards for the battlefield. With that they sat a standard on how these Holos look on a tabletop.
They produced two different styles, the see-through and the... not-see-through... as depicted here:
Okay, let's dive into it... HOLOS! YAY!
1. Print
Use the OHP sheets of your choice and print out the designs.
2. Varnish
Again, as with the paper prints, put some varnish on. Here it is best to use two layers of Gloss Varnish.
What can I say? Oh... maybe that you should leave a little extra space on the sides of your print. It is easier to cut any leftovers away later, that to cut too much in the first place...
4. Gluing the prints
The basic idea is, that you use the liquid varnish (glossy as gloss can get) to "glue" the prints on top of each other. You can simply put some few small dots of varnish on one side and then press them together. Of cause a lot of liquid will squeeze out on the sides, but that's not too bad. You have to watch out for air bubbles and squeeze them out.
You can do that so simple, because you have protected your print with the spray varnish. If you don't do that, you might get something like this:
5. Plexiglass
As you can see, looking at the MAS Holos, the really work just from one side, since on the thick plexiglass they use, one side is printed on and the other side is "the front" looking from there the Holo get's it depth. But looking from the "other side" the Holo looks more like a Poster.
To avoid that, I went to my local at store a got a sheet of 2mm plexiglass. I am going to "glue" it on both sides of the print, so the "holo effect" works from both sides.
Now I just need some sort of frame to hold it in place. I didn't build one before, since I didn't know how thick the final thing would be. Something like this:
6. Other uses
Once you have "mastered" this technique, the possiblillities will open up. On the Datapilar Building, i.e., I have used two prints on each side of a thick Plexiglass sheet. This way another sort of Holoeffect is achieved.
Well. That's basically it. The rest is practice, a steady hand and some imagination. I dearly hope you found all this useful.
Until next time!
Wednesday, February 24, 2016
Infinity Mercs - DEC
Greetings everybody!
With "Human Sphere" aka HS3 (a supplement book for Infinity) on the horizon and all the little hints about Mercenaries that keep popping up, I thought it was time to shed some light on my Merc stuff.
For those unfamiliar with Mercenaries in Infinity, here some introduction:
The fluff for Infinity states that humanity has colonised different star systems and is in a constant, yet really really REALLY fragile state of peace with each other. The aliens, called the Combined Army are the only constant opposition, which is shot at. Of cause there is always work for someone who is will to shoot at someone else for money or at least accepts money for walking around with a big gun in his hands. The term Merc is used in a reaally wide context, ranging from a gang of space pirates to single characters, roaming the sphere in search of stuff to kill. In game terms there is currently no existing rule set, that defines how a Merc gang would work /there has been, but it was never that good) so, Mercs are basically single Units, able to be included in other armies. I think the basic idea with the Mercs was to sort out weaknesses in lists, i.e. Ariadna (a technological rather left behind faction) doesn't have a own hacker. But they can compensate that lack by hiring a Merc Hacker.
Uh... do I have your attention again? :D
So. My idea for my Mercs is the following.
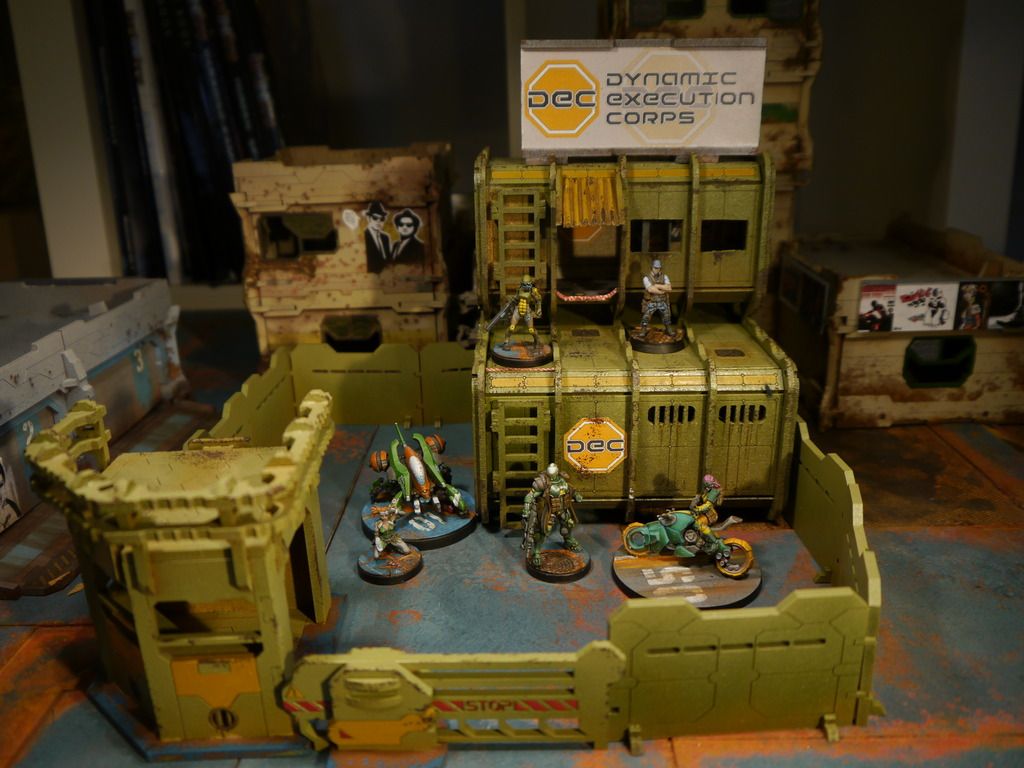
DEC, standing for Dynamic Execution Corps, is a Company that has two sides. On the one hand, DEC its own employees, security personnel, that can be hired at any chain store. On the other hand, DEC works as a link between independent characters that are looking for contracts and customers that have certain jobs to be attended to. Having exclusive contracts with the logistic company H-Logs, DEC can vouch for a quick and save travel and has a wide supply network. Each chain store can be used by the contractors as storage units for ammunition and equipment.
Let's start with the chain store, shall we?
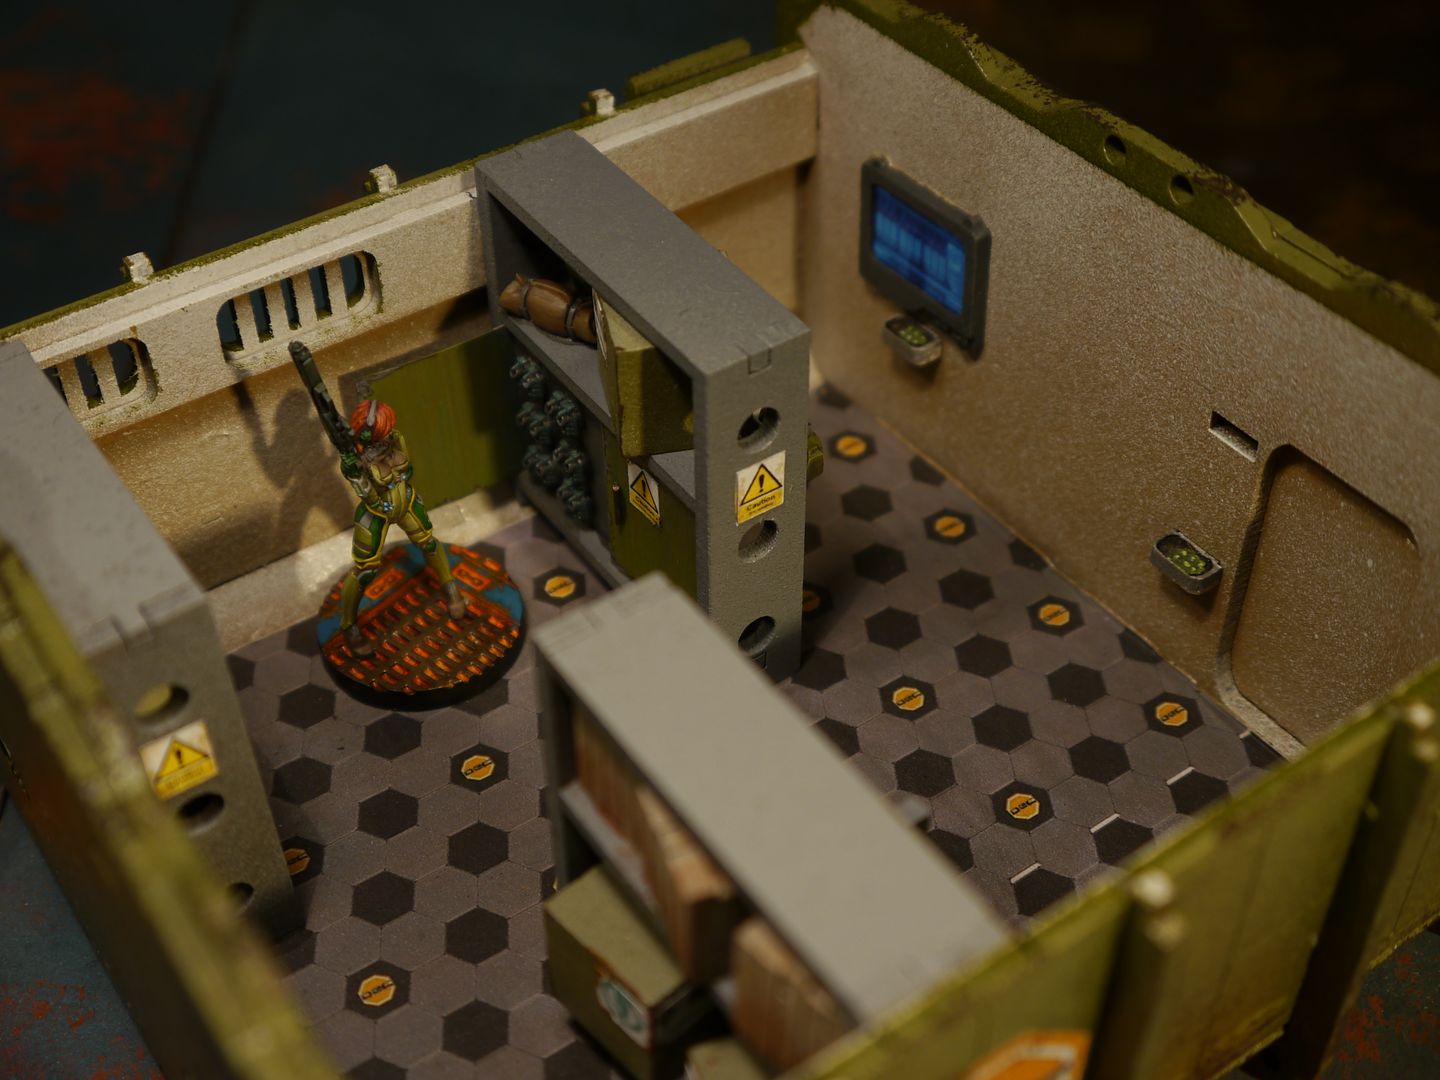
I used two storage containers from LJG which got a little cut apart (I "added" the side door and the windows on the top container). The banner on top is a print out of the design I made. More about print outs and their uses on the tabletop, next week btw.
I basically used Montana Gold Spray Cans ( you can get here ) for the green and a brush and some GW foundation yellow for... the yellow :D
The first floor is the bureau, where can hire the gun or man power you need...
... nothing spectacular here.
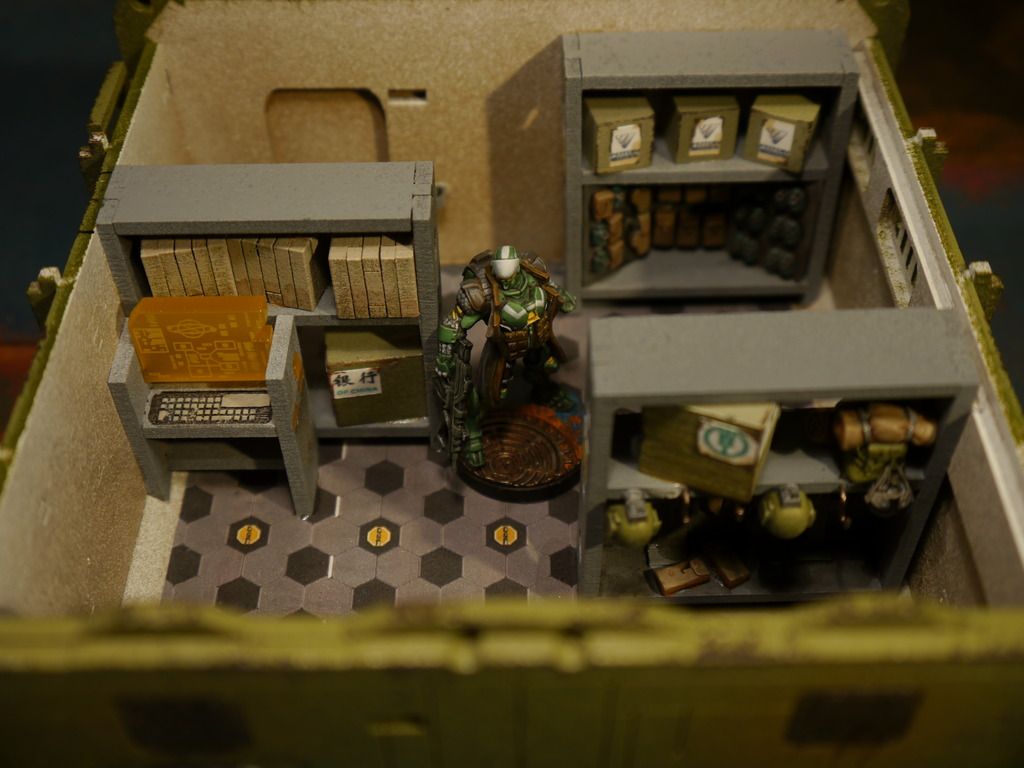
The larger containers interior shall represent the storeage and supply aspect. The racks come with the container, but are normally empty. I used wooden cubes from the art store as boxes and random bitz for the goods on the shelves. Nothing wild here, but imo it suite the room. The Info screen on the wall is from antenocities.
Here is a shot from the whole compound. With walls and check point from Zen Terrain.
Now... to the miniatures!
From left to right, CBs Valeria and a Tsyklon REM, the limited Authorised Bounty Hunter and a Authorised Bounty Hunter on bike.
As you will see on the following picture I tried to do the following with the paint scheme: The basic colors should be green and yellow. But I wanted to avoid a to uniform look so I used a different green on every model and I used a different amount of yellow. If you take the limited ABH and the Bikerlady. He nearly got no yellow, while she is sporting quite lot on her dress.
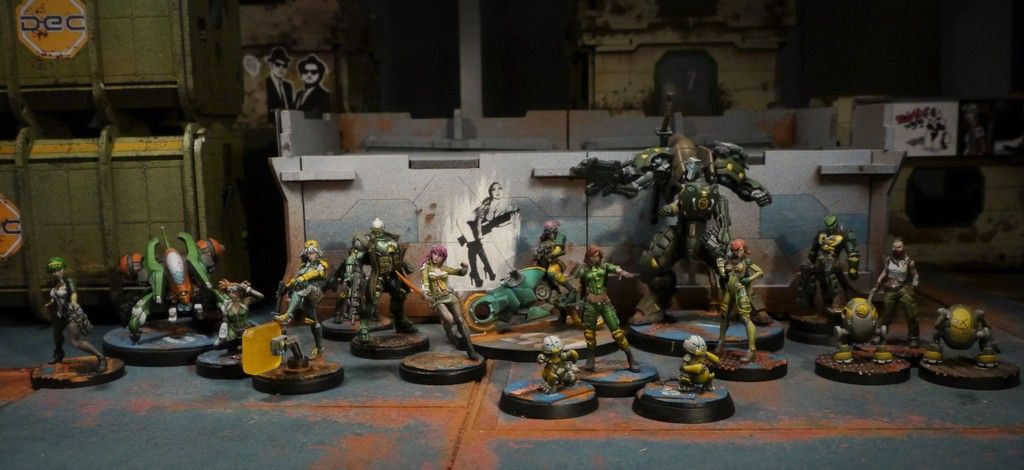
The gang's all here.
All my Merc models so far.
From left to right:
CBs CSU (Operation Icestorm Box); CBs Tsyklon REM and Valeria; ABH (ITS 2014); ABH (Rulebook preorder); Miranda Ashcroft (Artbook); ABH on Bike; Haqqislam Guhlam Doc (Support Box) with crazy coalas (together they count as Nomad Moran Massai); in the back an Anaconda Merc TAG with Pilot; custom ABH (Grenzer Body, PanO Spitfire, Aleph SpecOp helmet); Maria "The Crow" from Armoured Syndicate with her droids (count as Moran Massai as well).
I am really keen on sculpting and converting, but with Infinity you have (almost) perfect models, so not much to do. Aside fro that , all the factions have such a specific design, that is quite a task to work other companies modes into the line with them standing out like the odd kid. The Mercs give me the perfect excuse to bring in all the models that have no spot with my nomads. So, when ever I feel the urge to paint something else than orange and grey... here we go. Green and yellow. :D
I hope you liked my little excurse.
Next week I will have a Tutorial for you again on how to use your printer to the best effects on the tabletop. So, tune in, if you want to see my way of doing floors, holo-boards and street signs.
Until then!
Subscribe to:
Posts (Atom)


